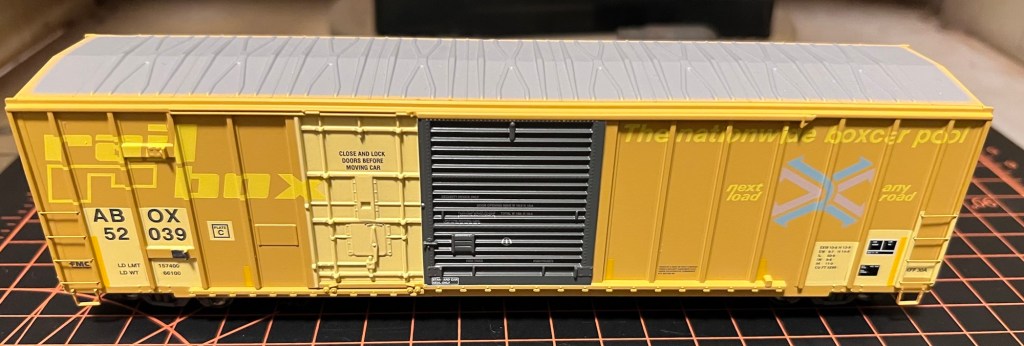
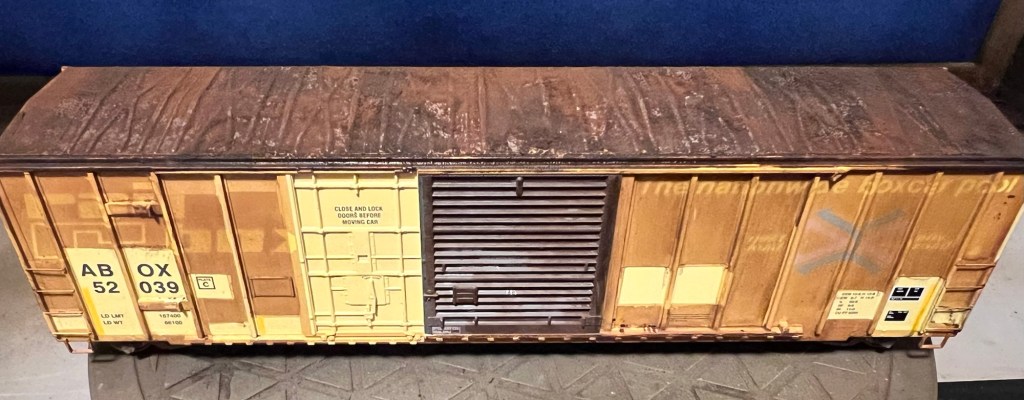
I’m posting this morning another project finished for a local modeler/client. This is one of three HO scale cars to weather in between working on more HOn3 cars. This car was picked up at a recent operating session. This Railbox car is a “primed for grime” series car and looked as such below out of the box:
The owner wanted all the patched areas left intact including the yellow doors so I taped all these areas off first. I then proceeded to apply a brown wash to the car to tone down the yellow. This wash applied in several strokes between each rib also gives the car the appearance of dirt streaked down the sides.
Next came a light spray of Vallejo dirt color acrylic paint followed by a light spray of Vallejo rust paint, as this gives these Railbox cars the sort of brown/ orange color that a lot of these fade to. Photo below after this step:
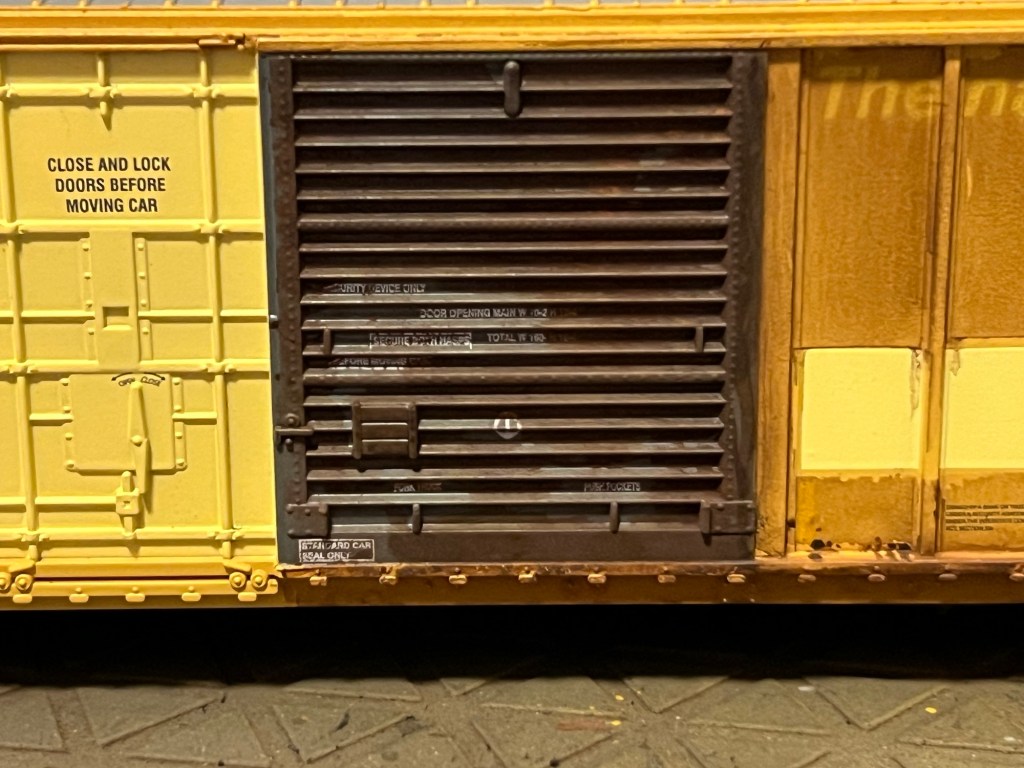
Next up was rusting the main doors on the car as also shown above. This was done with rust texture followed by an application of rust powder while still wet. This gives the feel of rust when dry. The next step was the roof of the car.
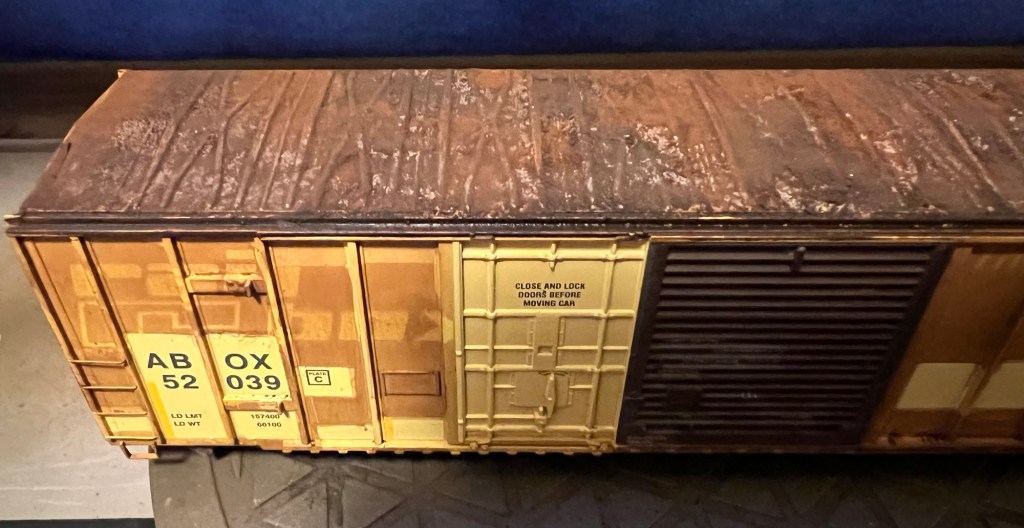
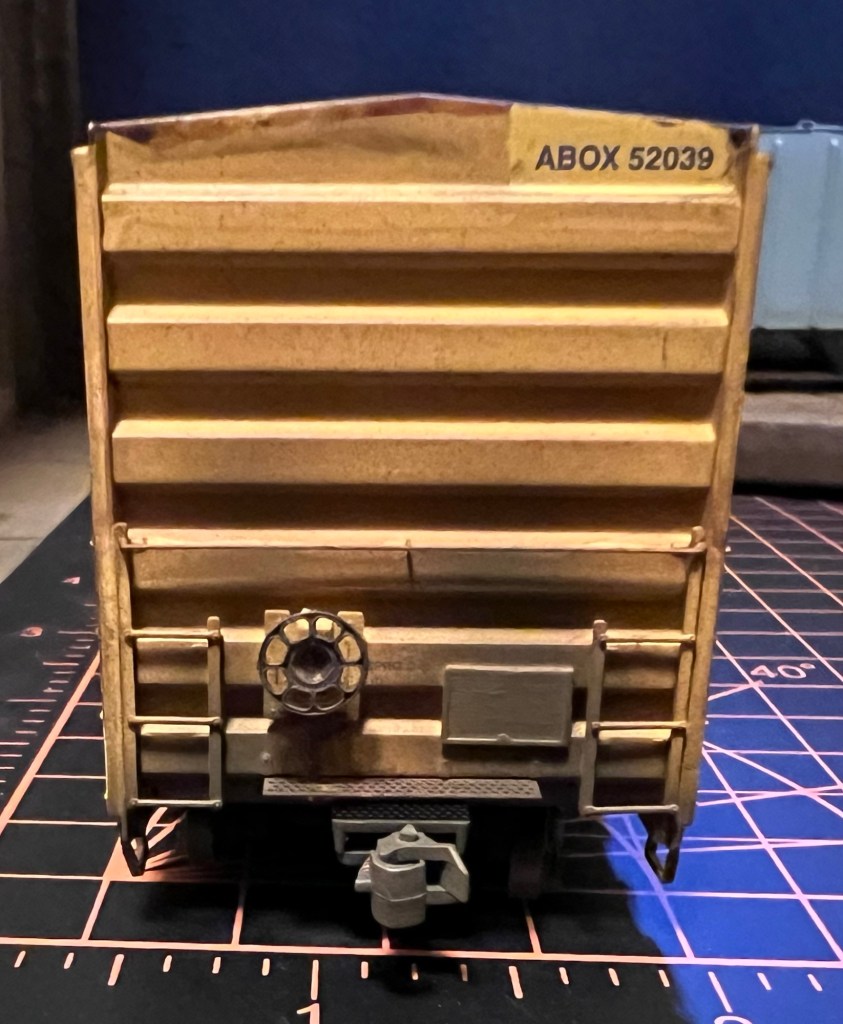
For the roof, I first sprayed Vallejo rust over the aluminum color roof as a base coat. When dry I coated the roof a little at a time and while wet applied track rust and metal slag pigment from Ammo. The roof was then sealed with pigment fixative. Another round of pigment went on top followed by more pigment fixer. Photos of the roof below:
Next up was an application of the brown wash in between the end ribs on the car followed by a dirt overspray for the dirt kick up from the wheels. Next was an application of rust texture and Monroe powder on the brake wheel. Photo below:
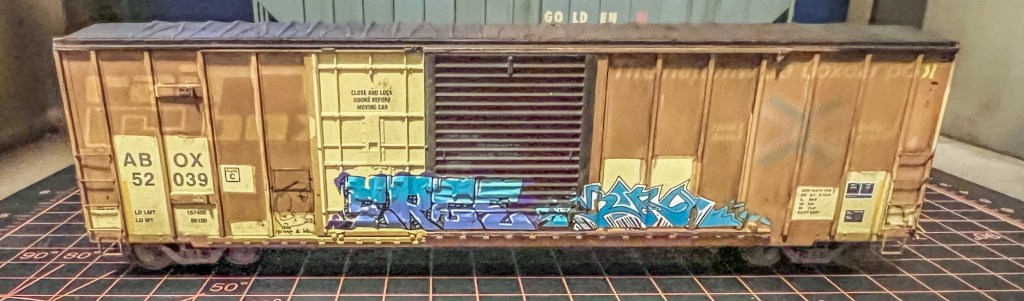
Next up was spraying the underside of the car first with a rail brown/ grimy black mixture then lightly spraying light grey to highlight areas followed by an application of dirt color Pan Pastels. Of course in between applications the car was sealed. Last but not least I painted the wheels and axles with Vallejo rust and sealed these, then reattached them after drying for 24 hours. The final result is shown below:

Another view of the other side also showing graffiti the client wanted applied:

Leave a comment